


Install and Activate your eSIM
Buy your eSIM before
you travel.
Install it in minutes
with the app or QR code.
Connect automatically
when you arrive.
Select the device on which you are going to complete the process

Select the type of installation you wish to perform
Before you begin installation with Roamvy app, there are a few important points to be aware of:
- Your device is unlocked and eSIM compatible.
- You’re connected to a stable Wi-Fi network.
Before you begin manual installation, there are a few important points to be aware of:
- Your device is unlocked and eSIM compatible.
- You’re connected to a stable Wi-Fi network.
Before you begin installation with a QR code, there are a few important points to be aware of:
- Your device is unlocked and eSIM compatible.
- You’re connected to a stable Wi-Fi network.
Let’s get started together
01
Open the Roamvy app
Sign in and go to My eSIMs at the bottom of the screen.
02
Select your plan
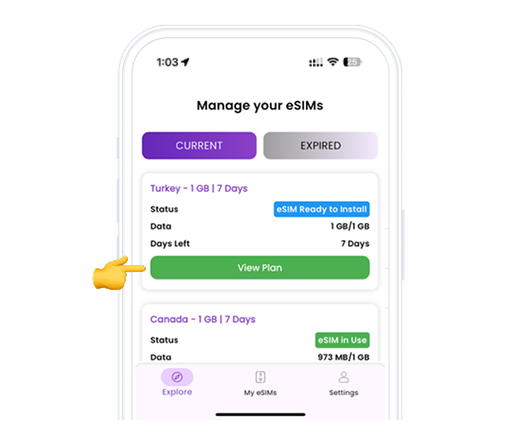
Choose the plan you want to install, then tap Install eSIM Now.
03
Follow the on-screen steps
The app will guide you through the installation process, keep WiFi on and stay connected.
eSIM installation guide with Roamvy App
Open the Roamy app
Open app and click on My eSIM at the bottom of the page.
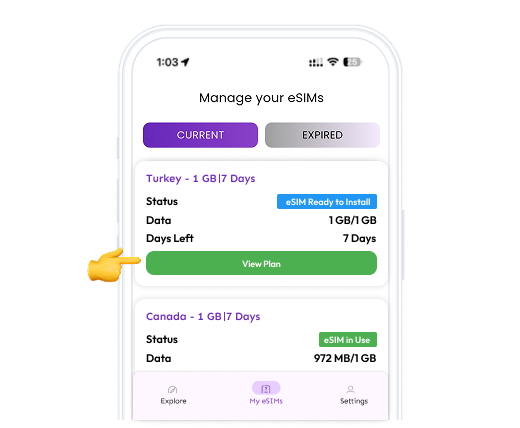
Choose Plan
Choose the plan you want to install, then tap Install eSIM Now.
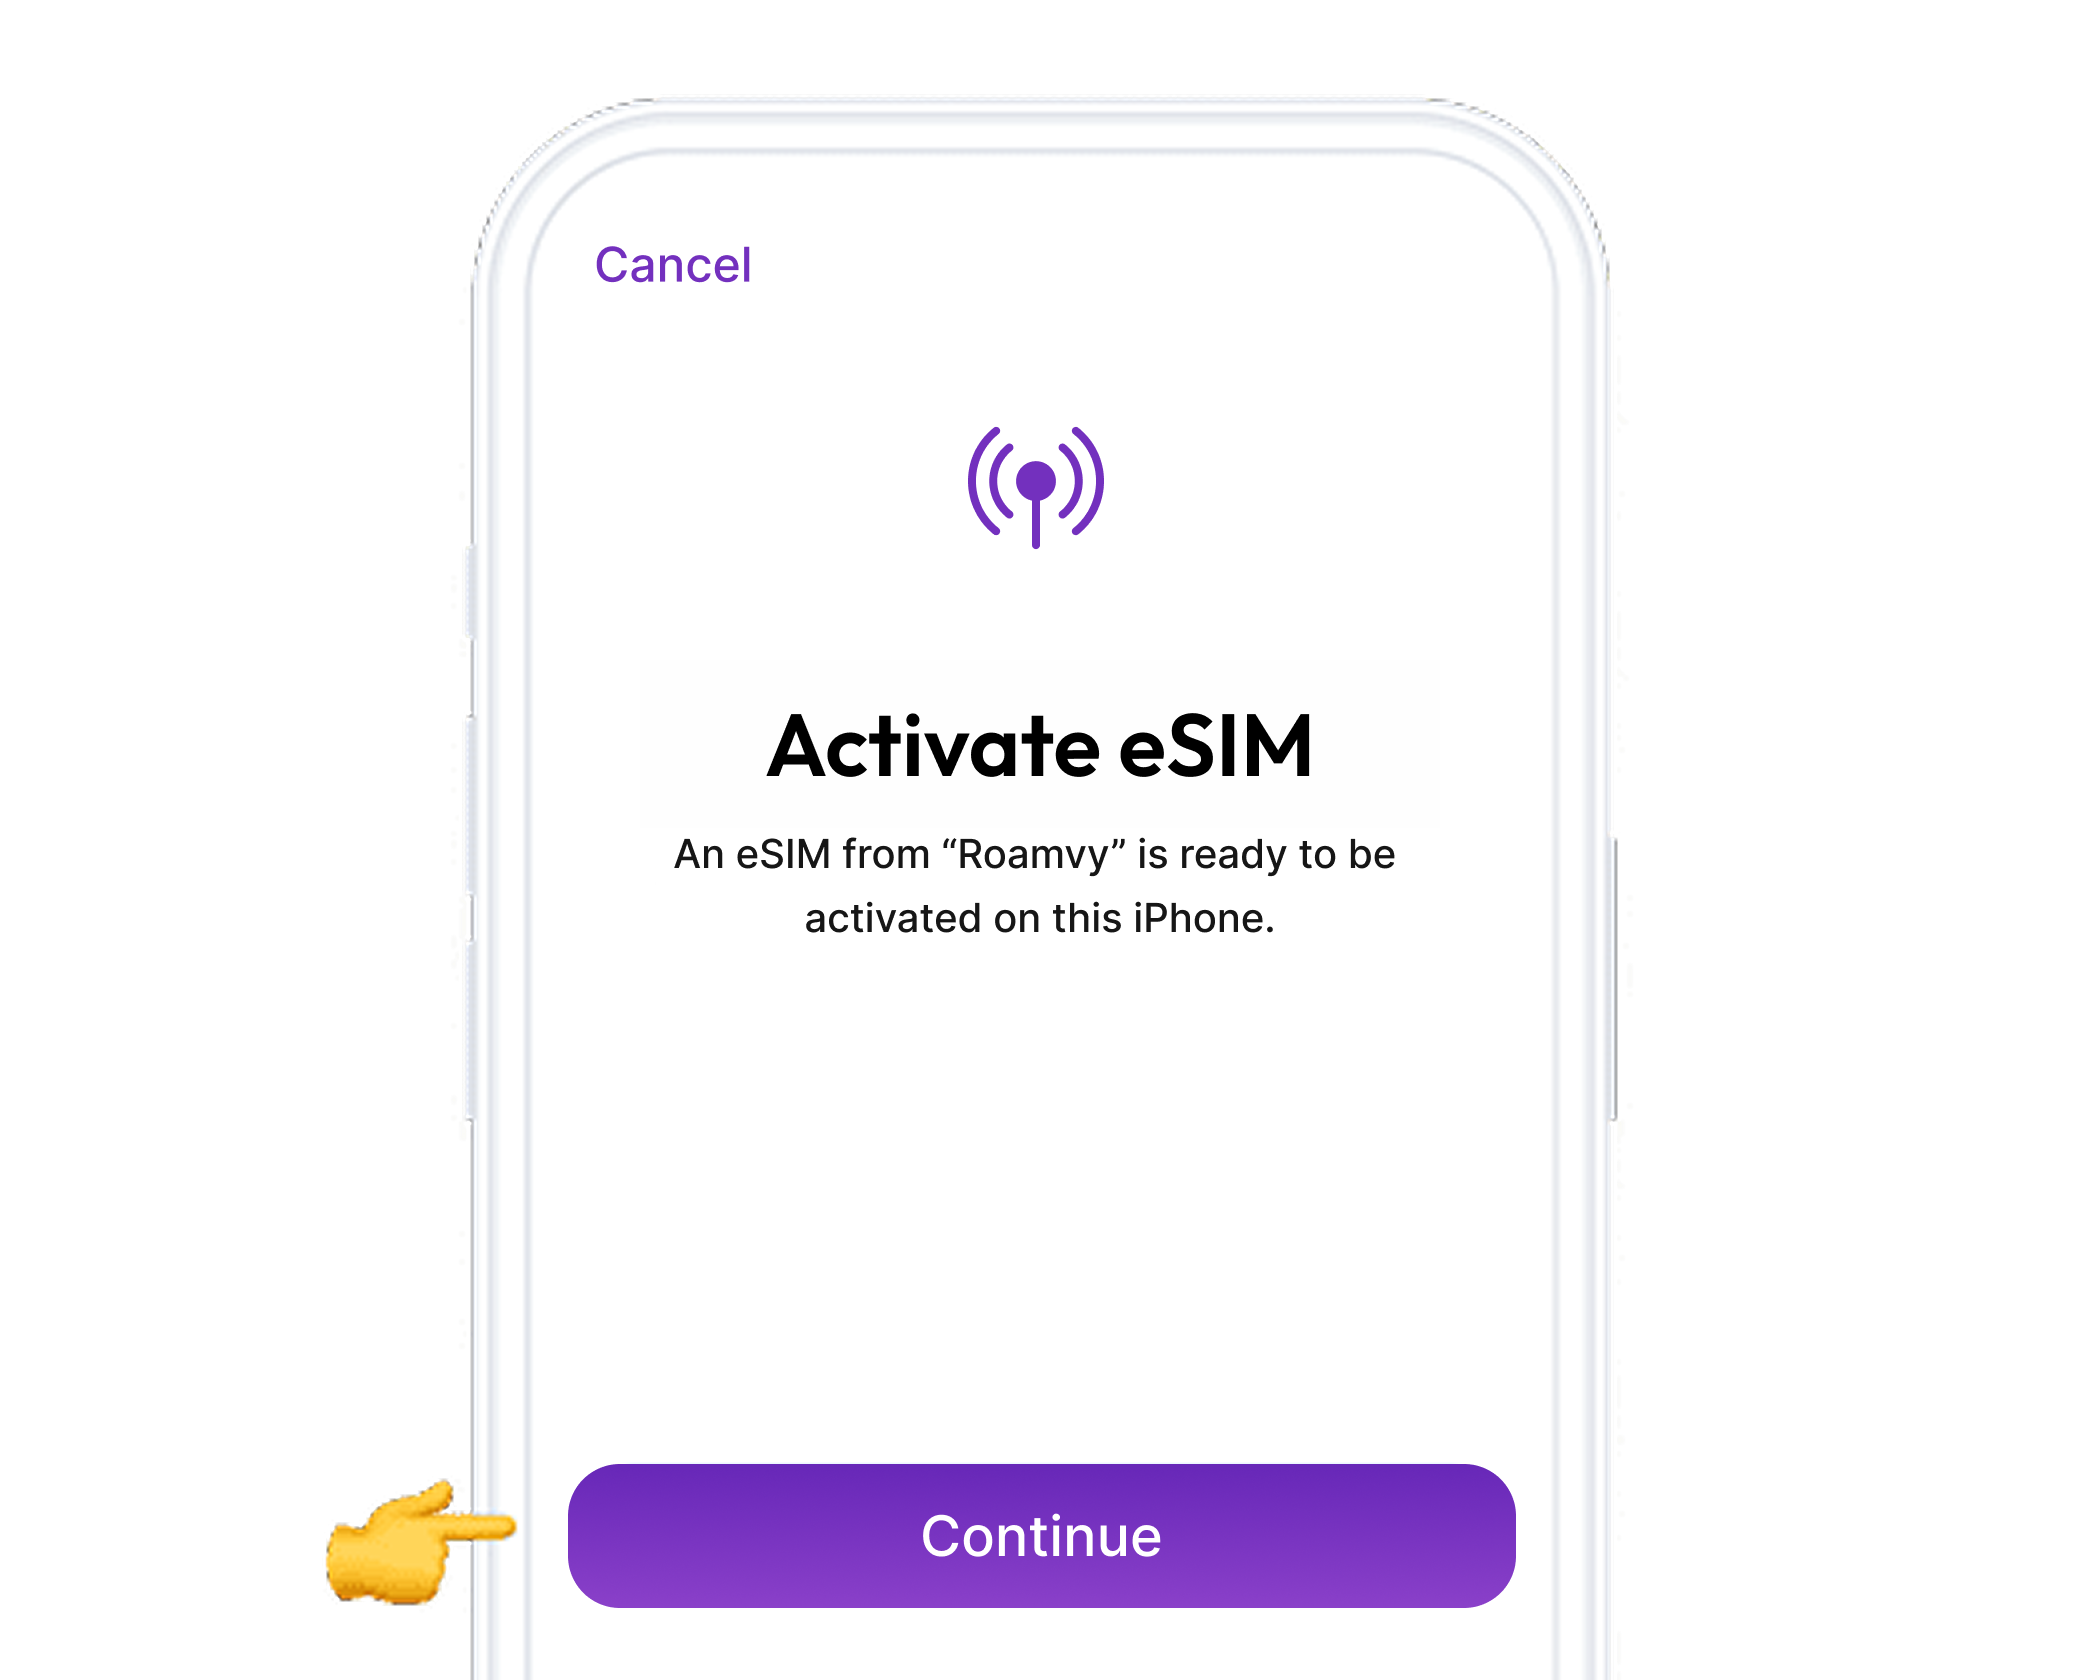
Install your data plan
The installation process will start automatically, iPhone will guide you through the installation process, keep WiFi on and stay connected.
Click on Continue
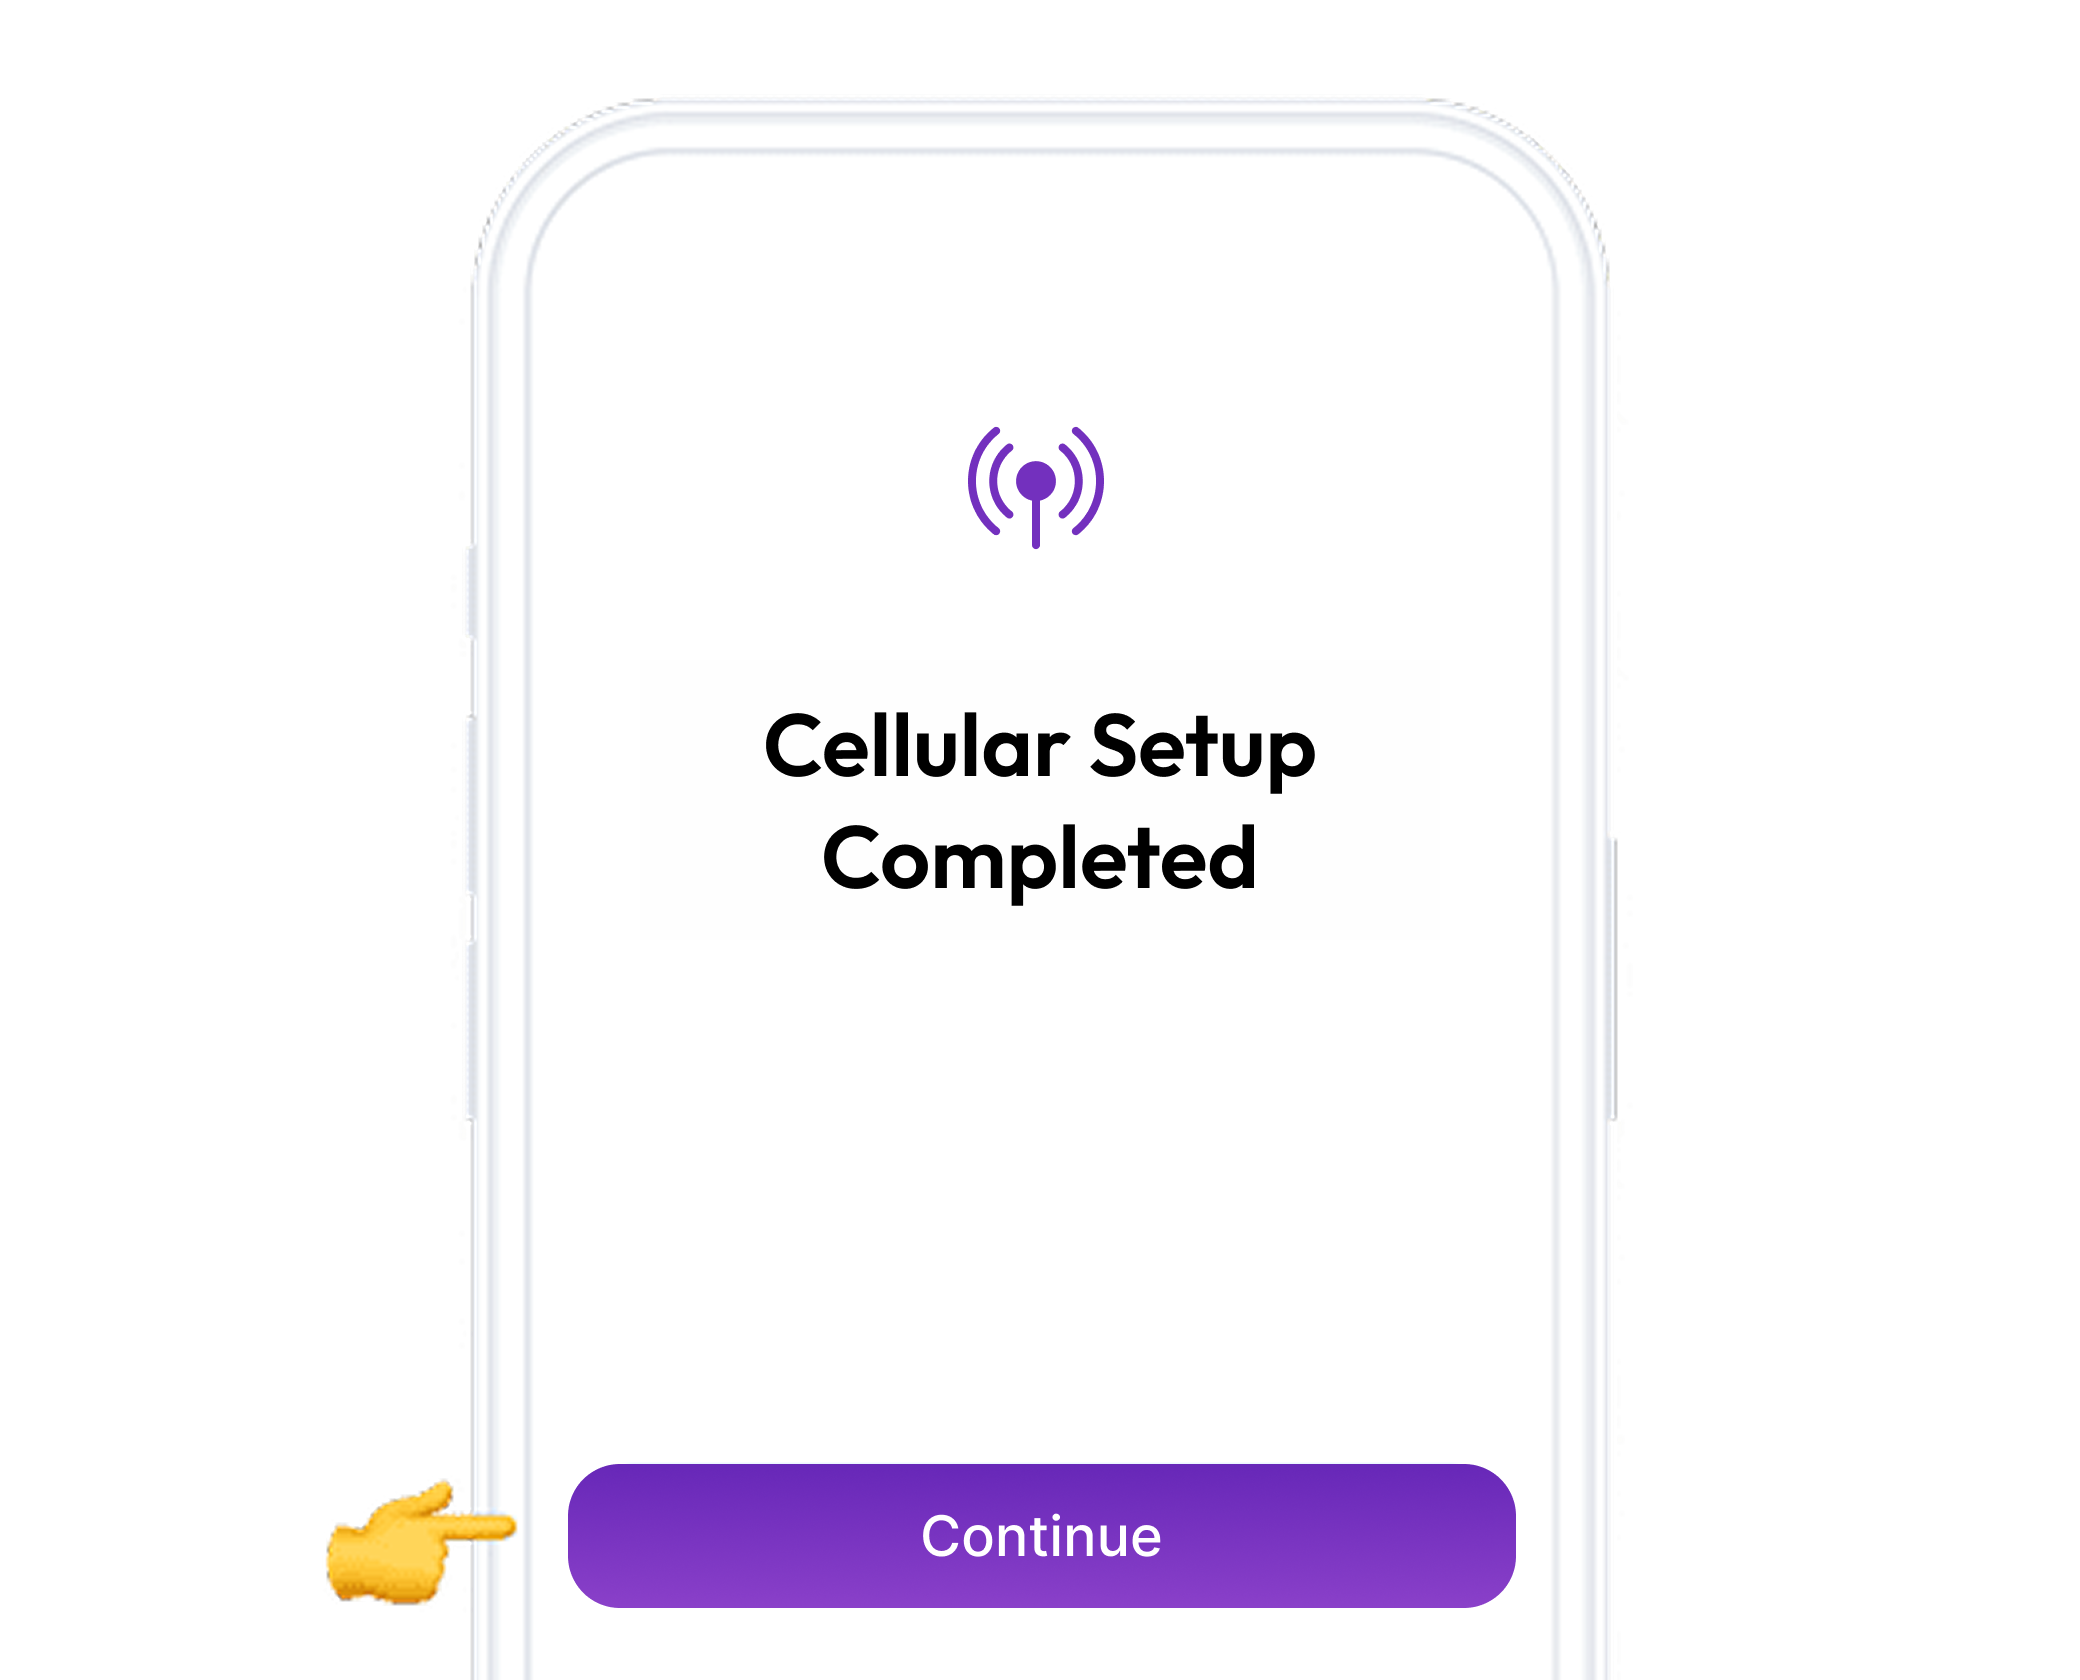
Mobile configuration completed
Your plan has now been installed.
Click on Done
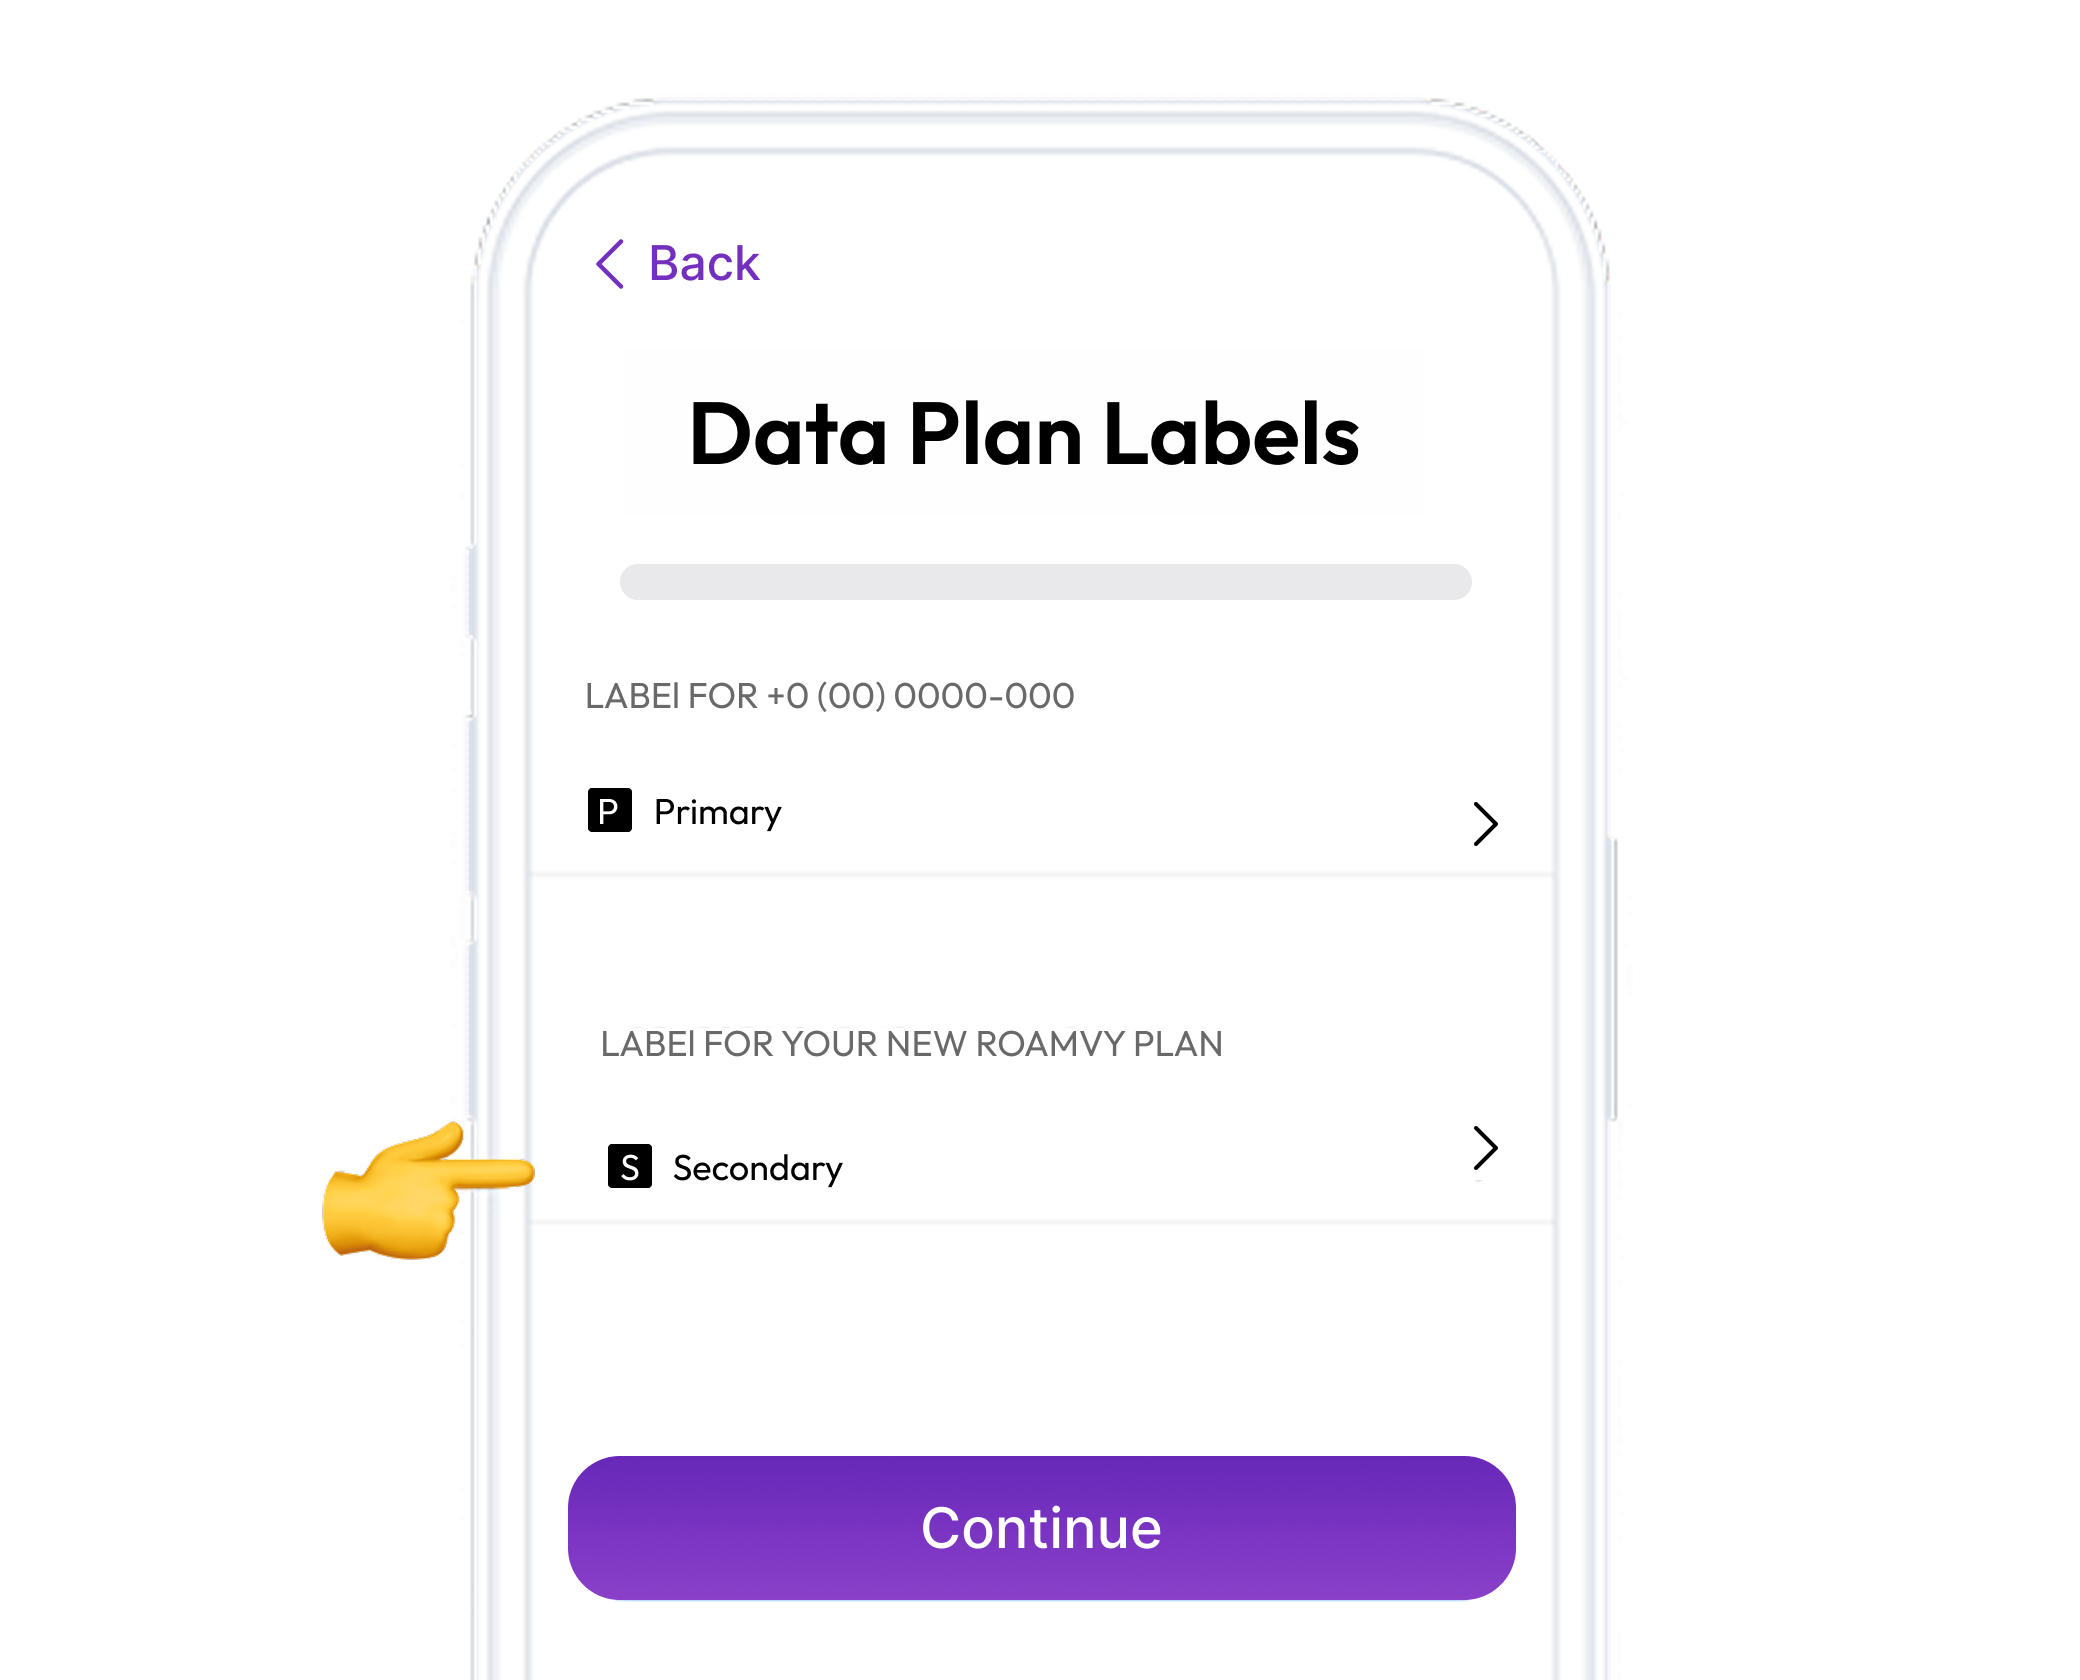
Label your data plan
Tap on the eSIM added and rename it to Roamvy to easily identify it later.
Click on Continue
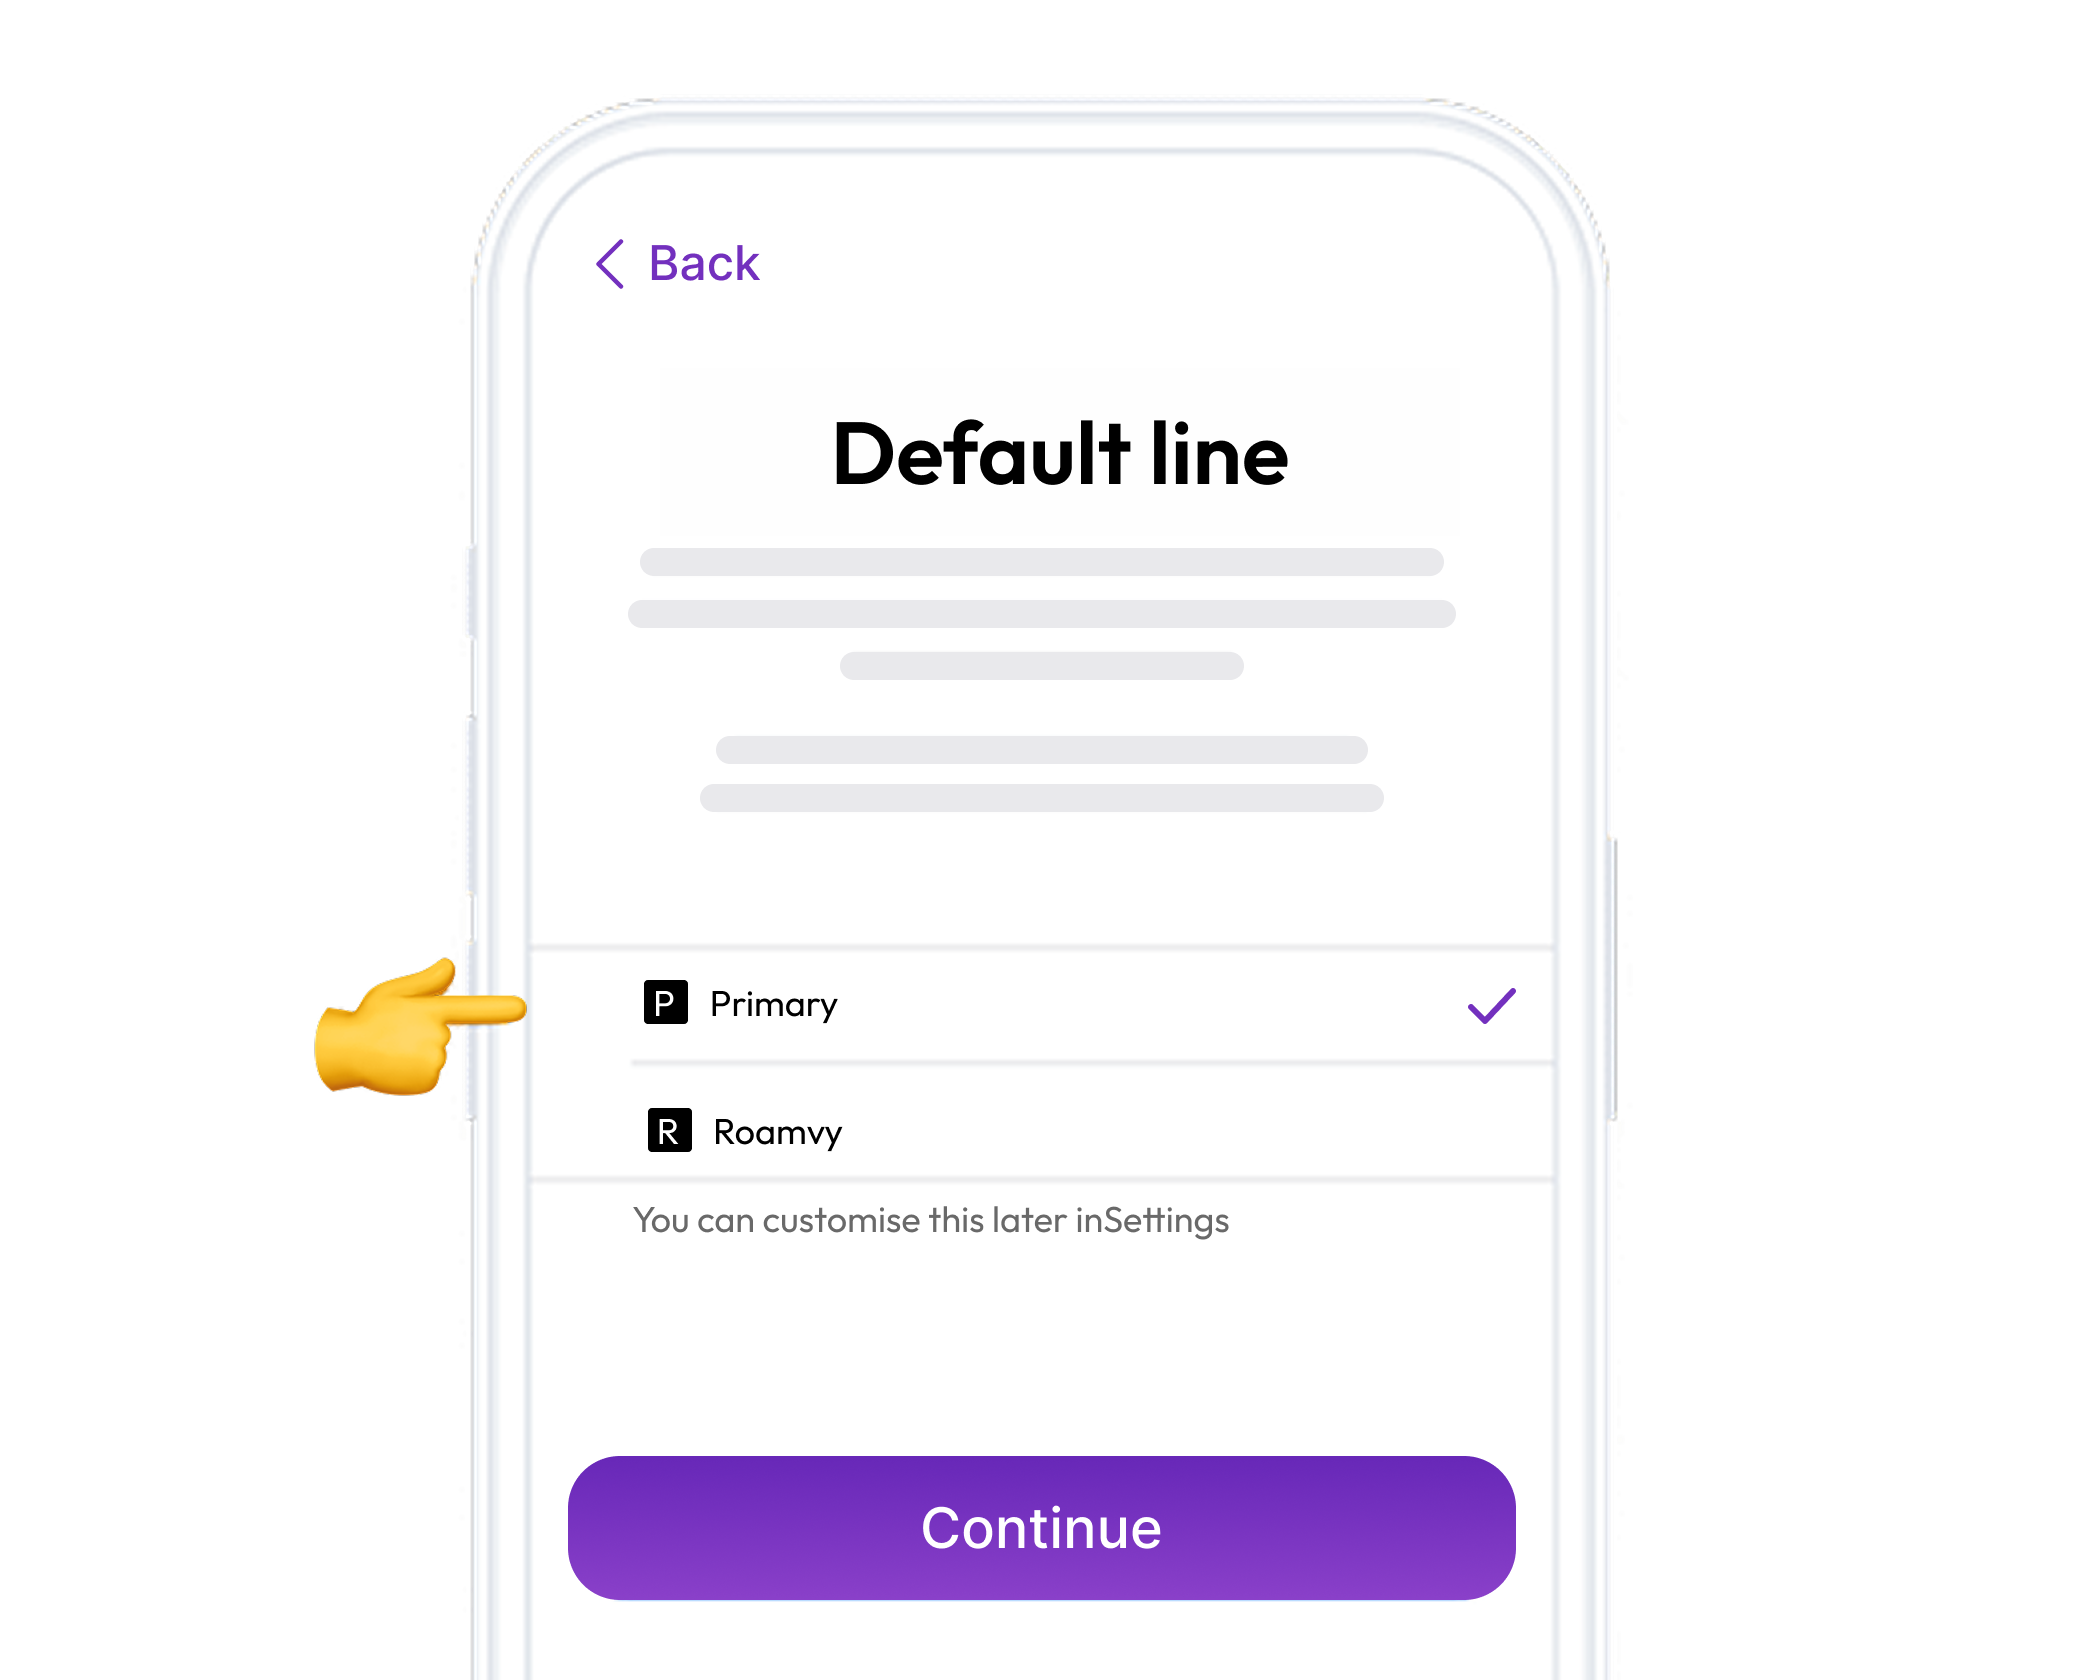
Choose your default line
Select the “Primary” option to continue using your number to receive messages and calls.
Click on Continue
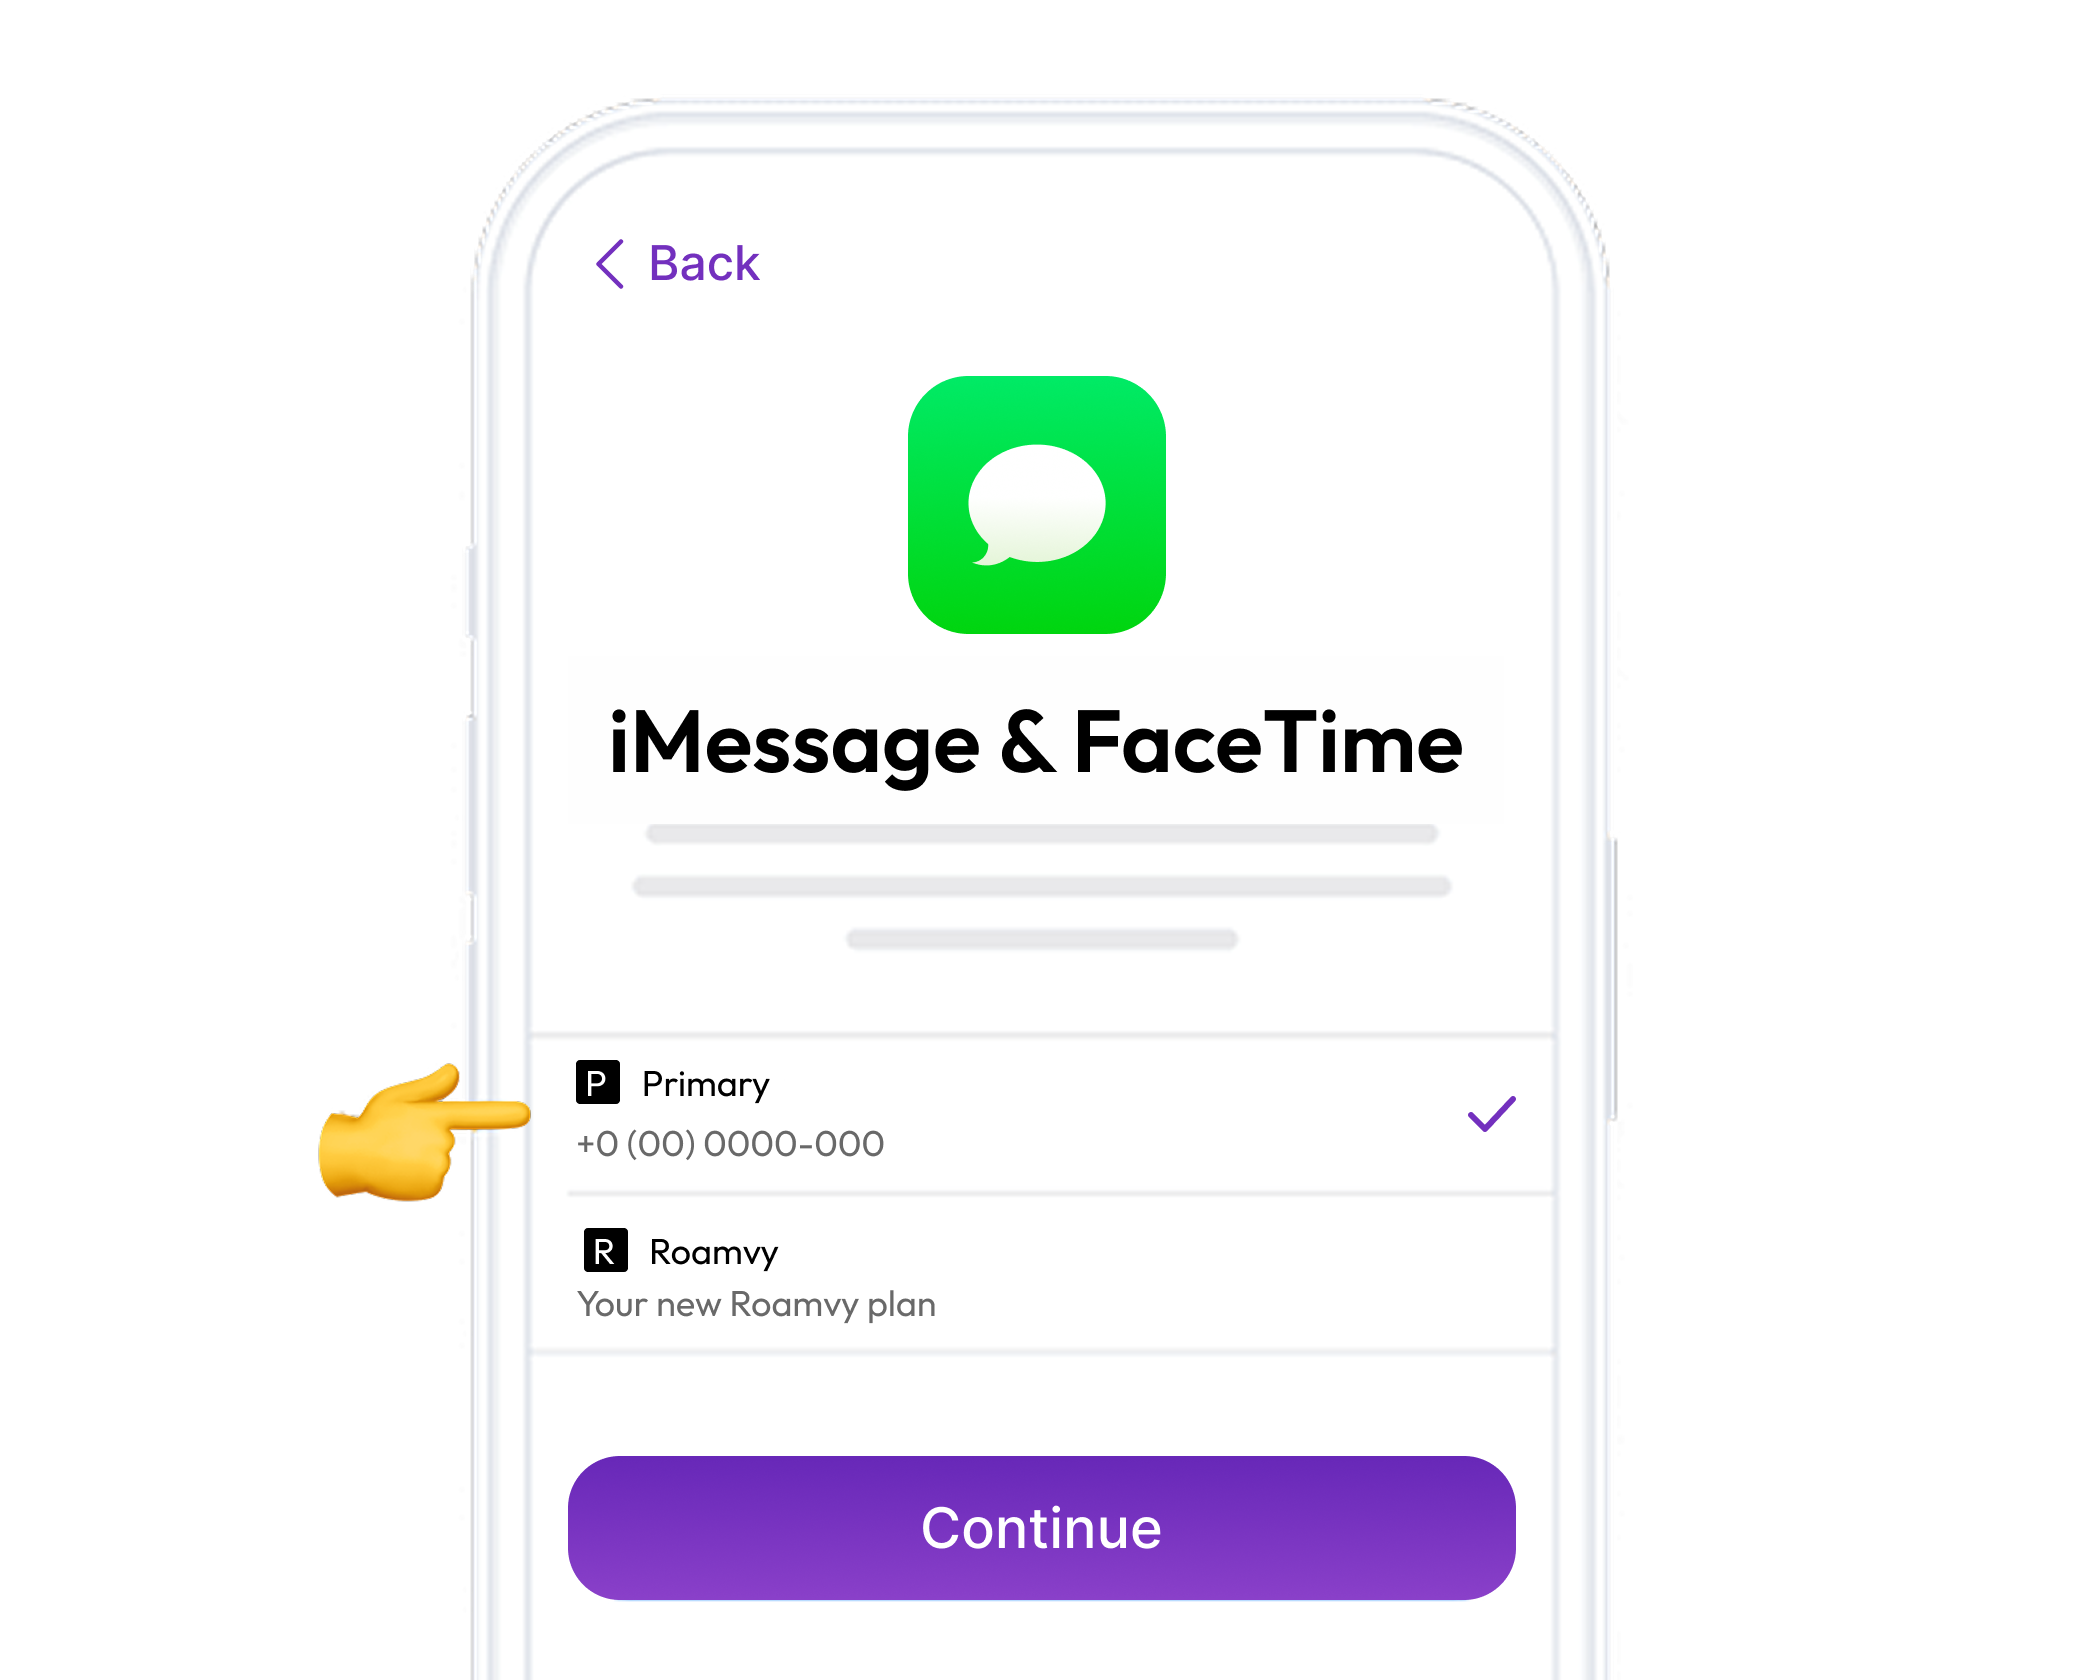
iMessage and FaceTime
Select the “Primary” option to continue using your number for iMessage and FaceTime.
Click on Continue
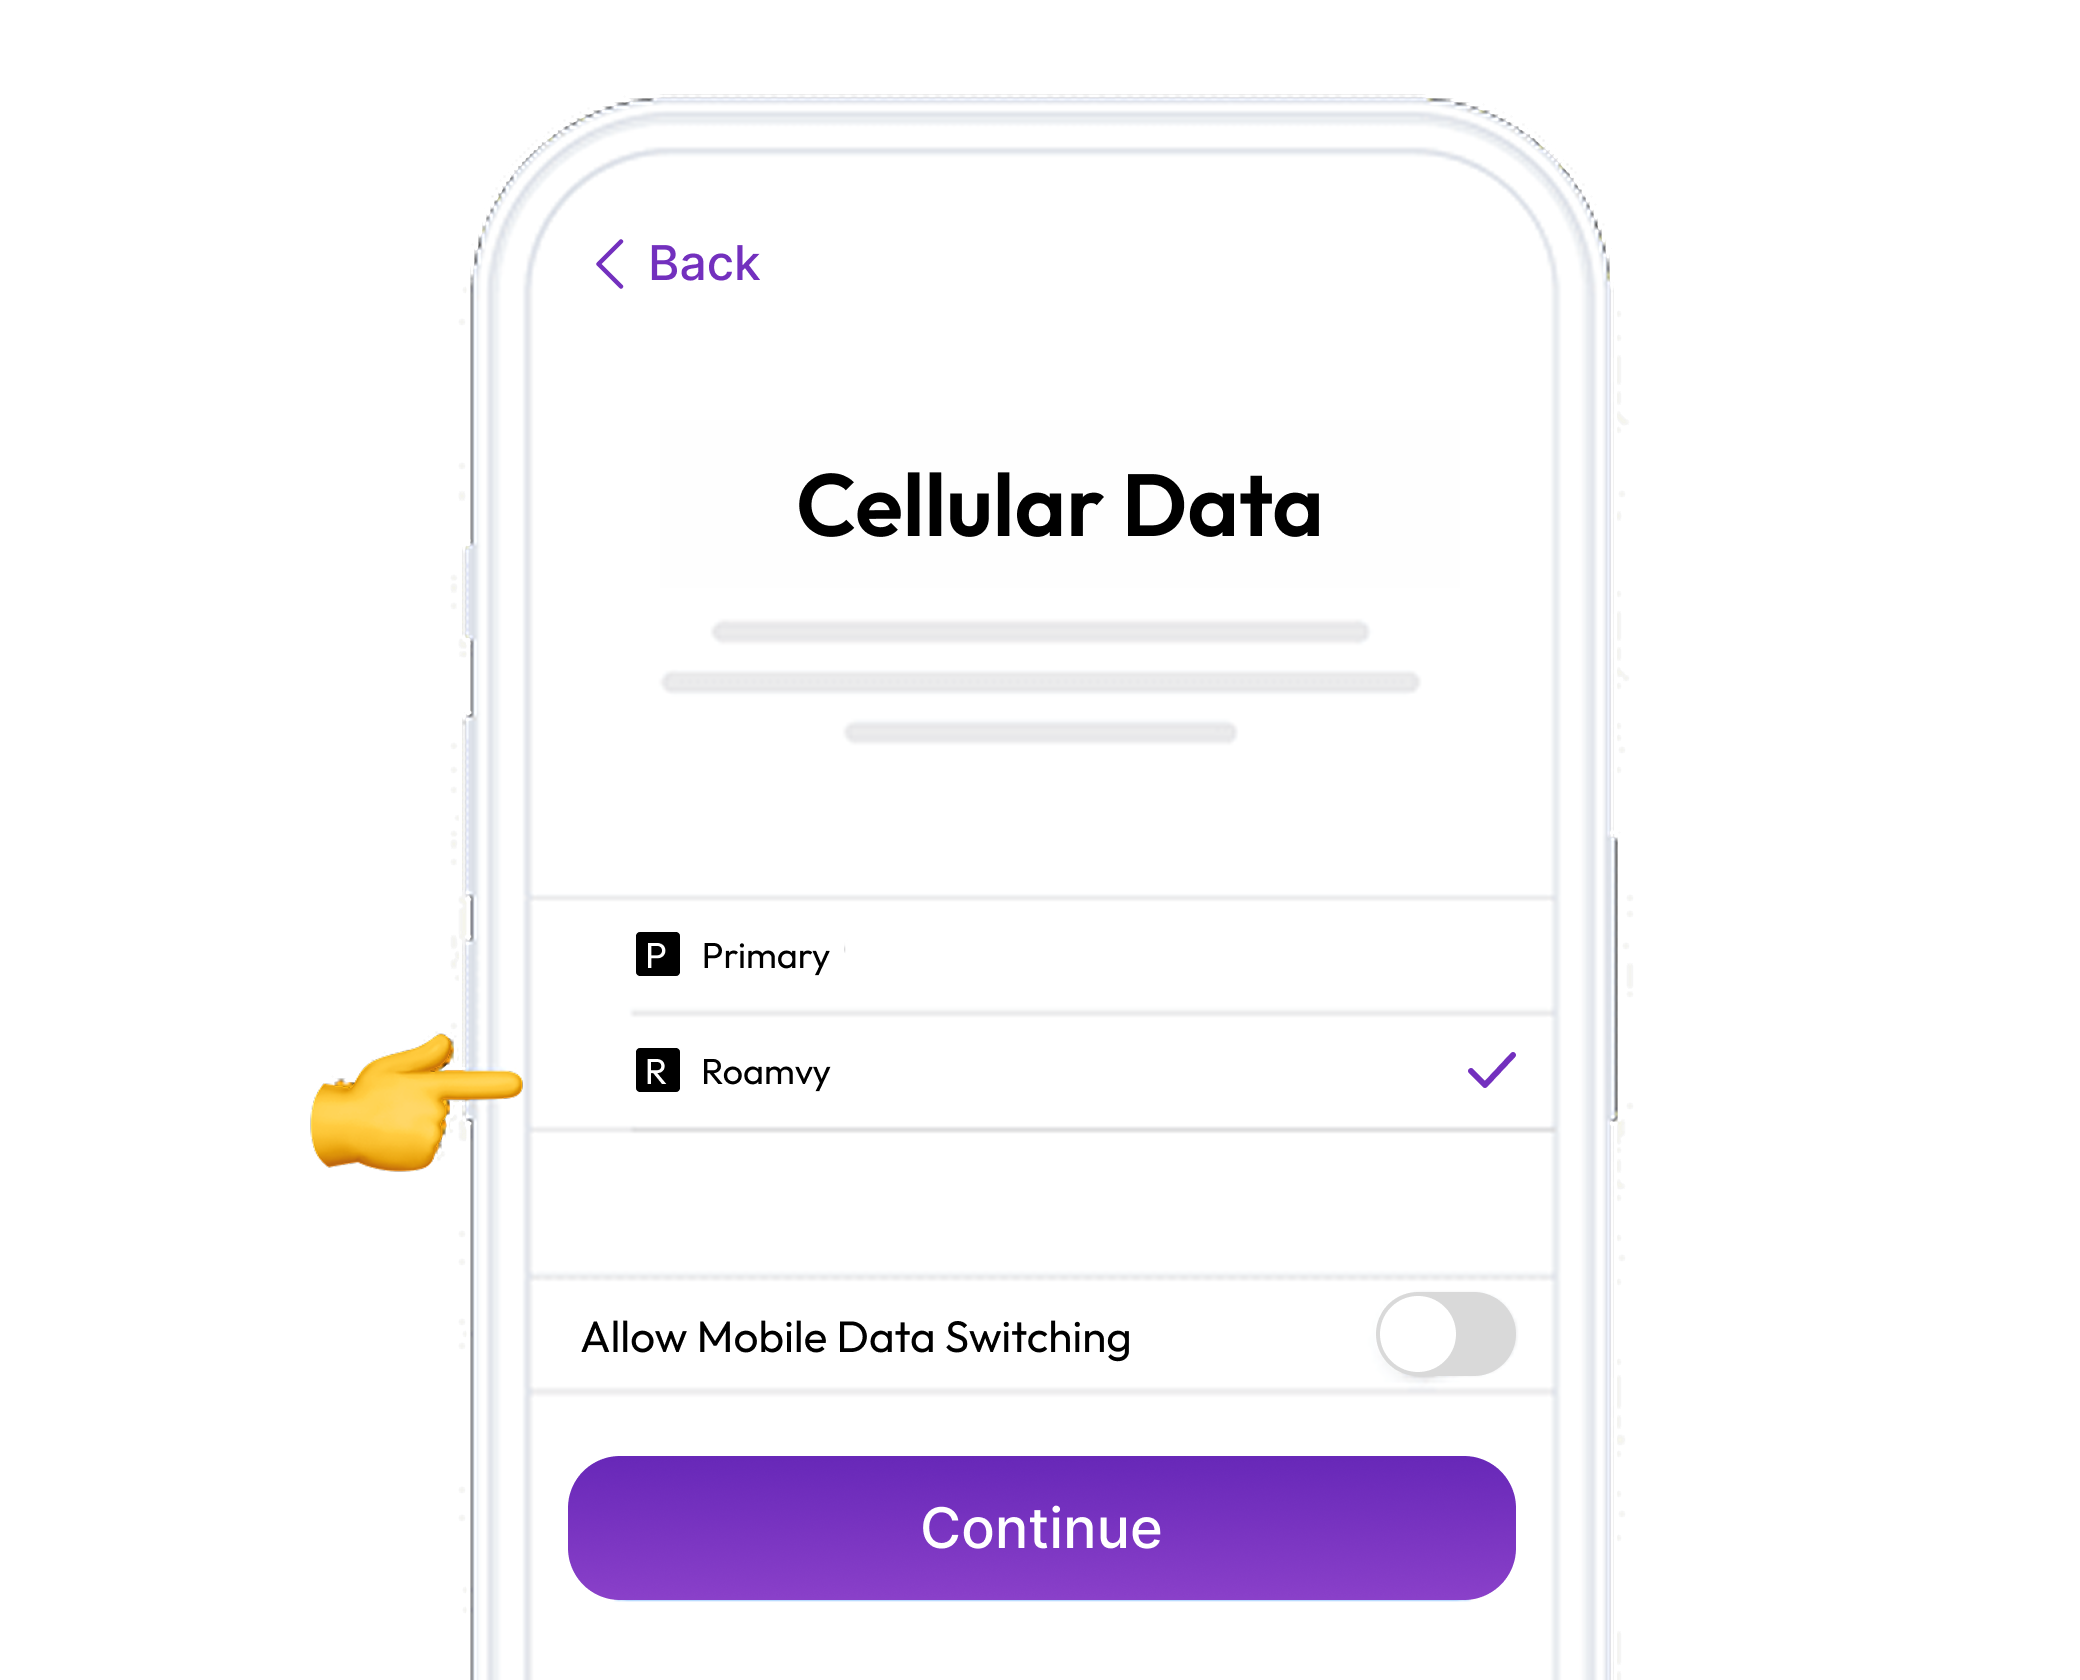
Mobile data
Select the new eSIM added, “Secondary” / "Roamvy"
Keep “Allow Mobile Data Switching” turned off to avoid additional roaming charges.
Click on Continue
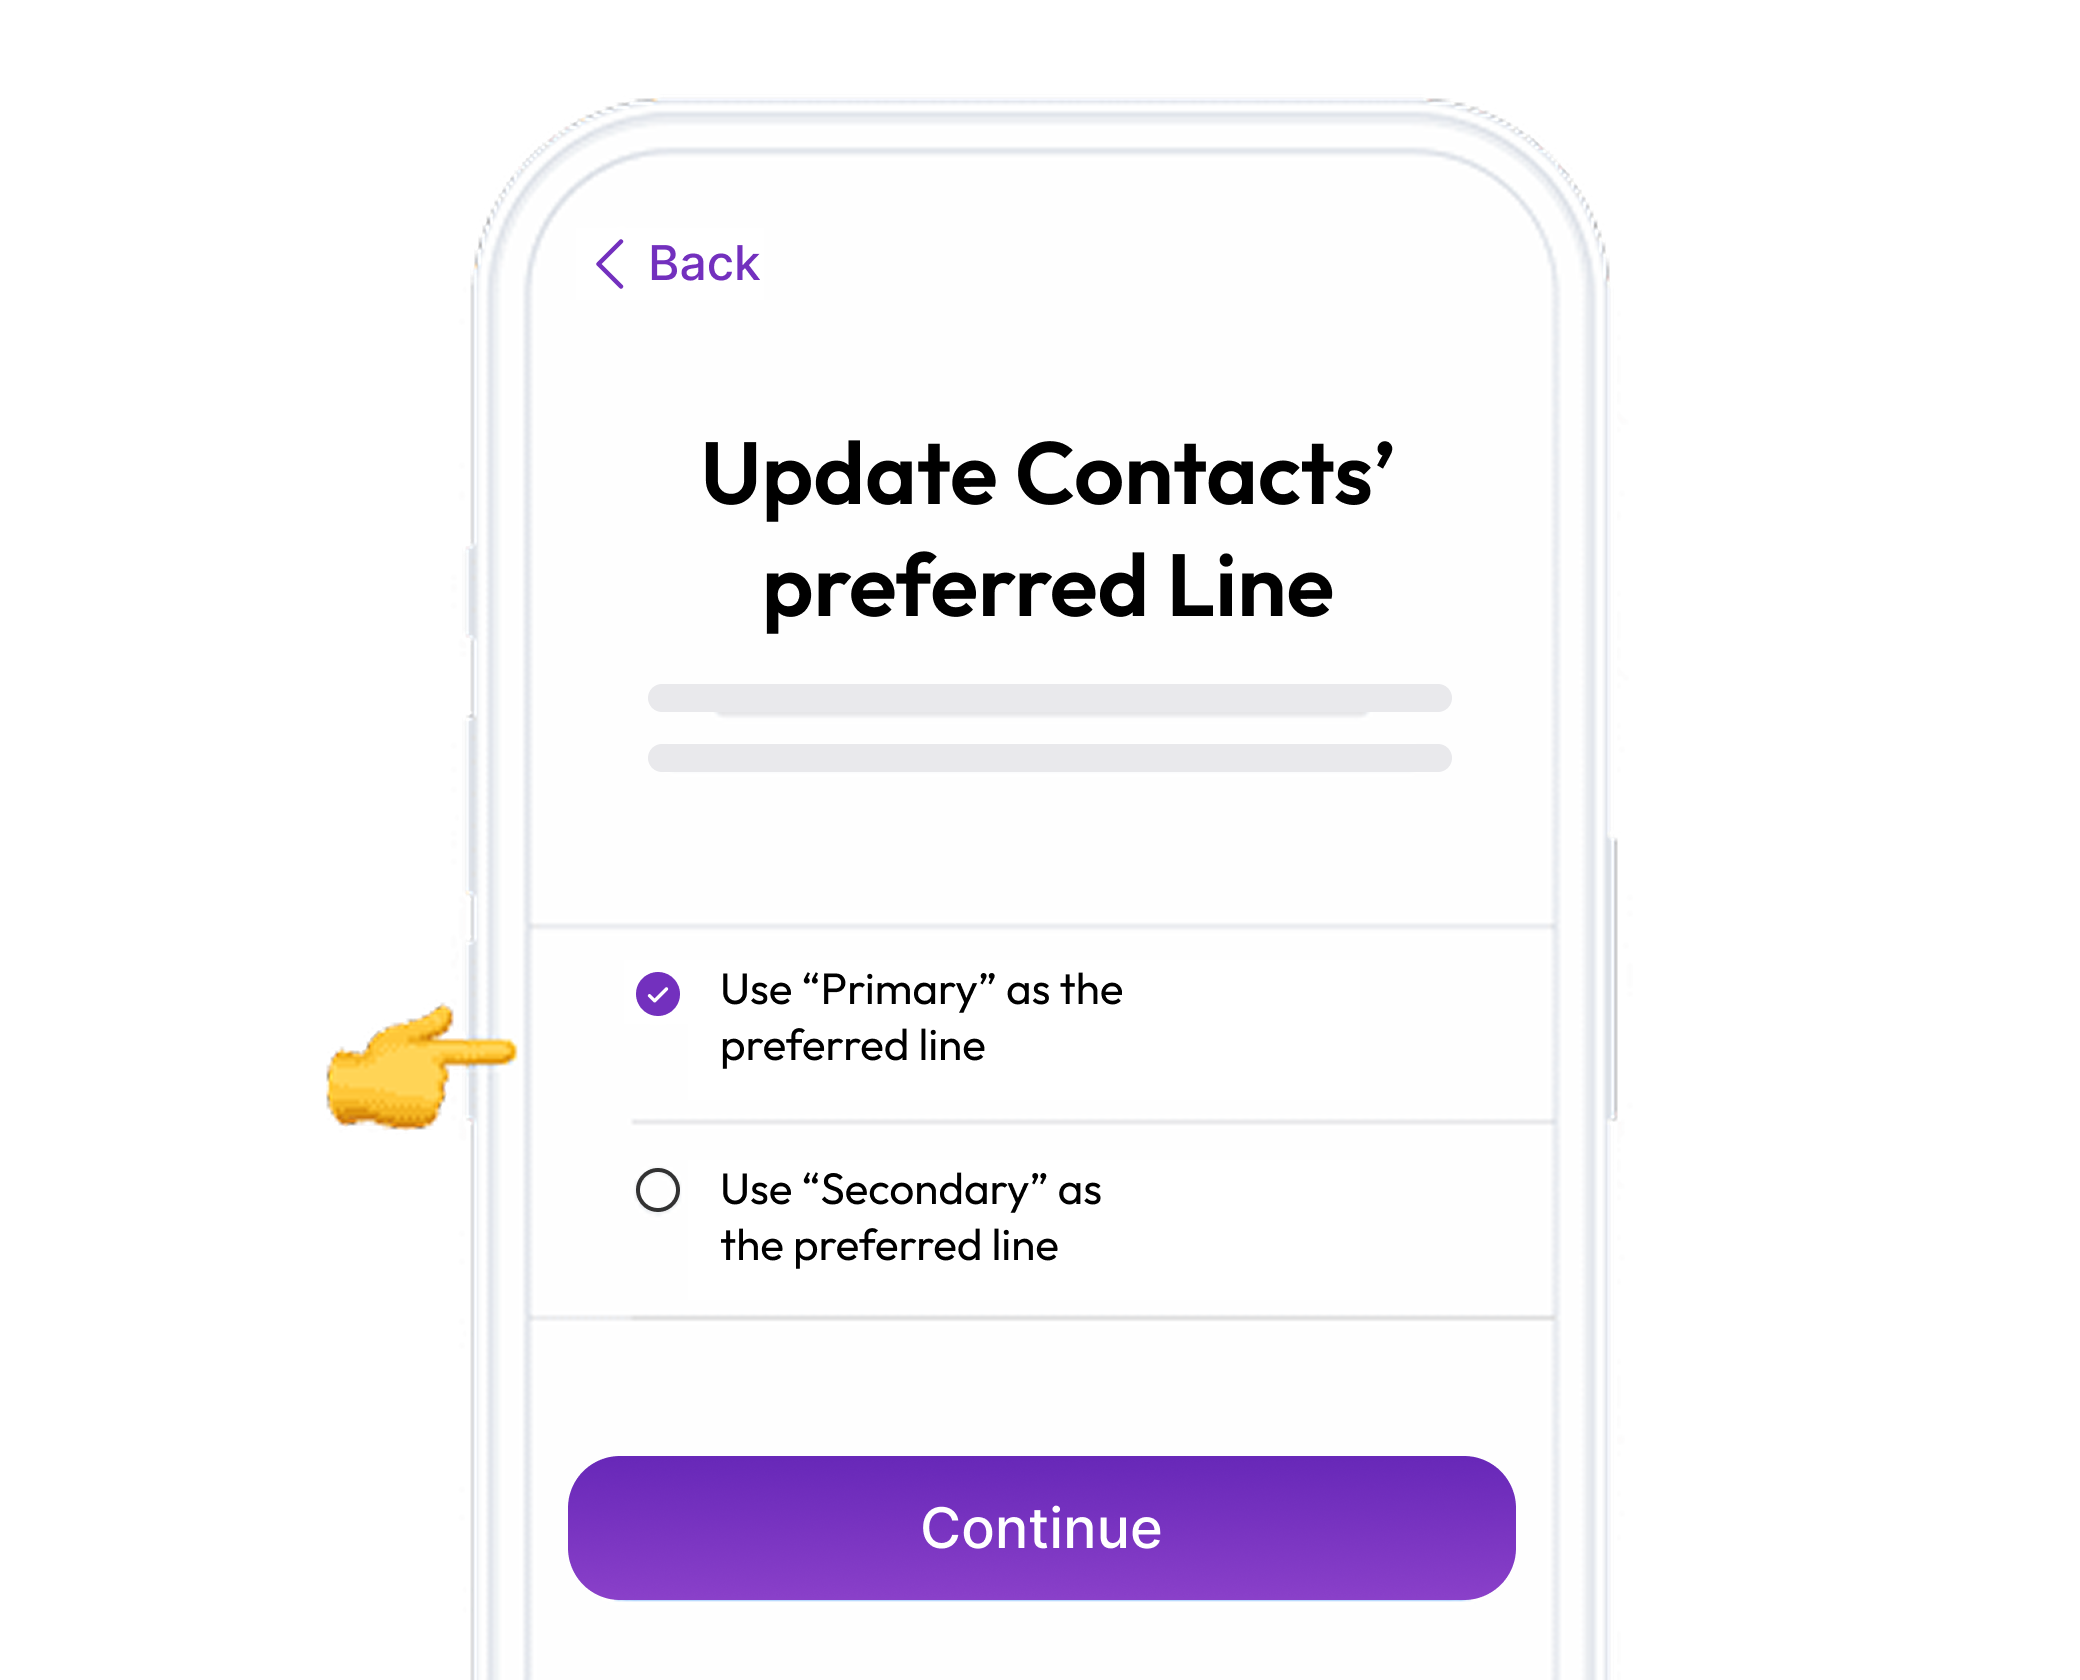
Update your preferred line for contacts
If you come across this step, we recommend selecting “Primary” as your “Preferred Mobile Data Plan” so that you do not lose information from other SIMs or eSIMs you have installed.
Click on Done to complete the process.
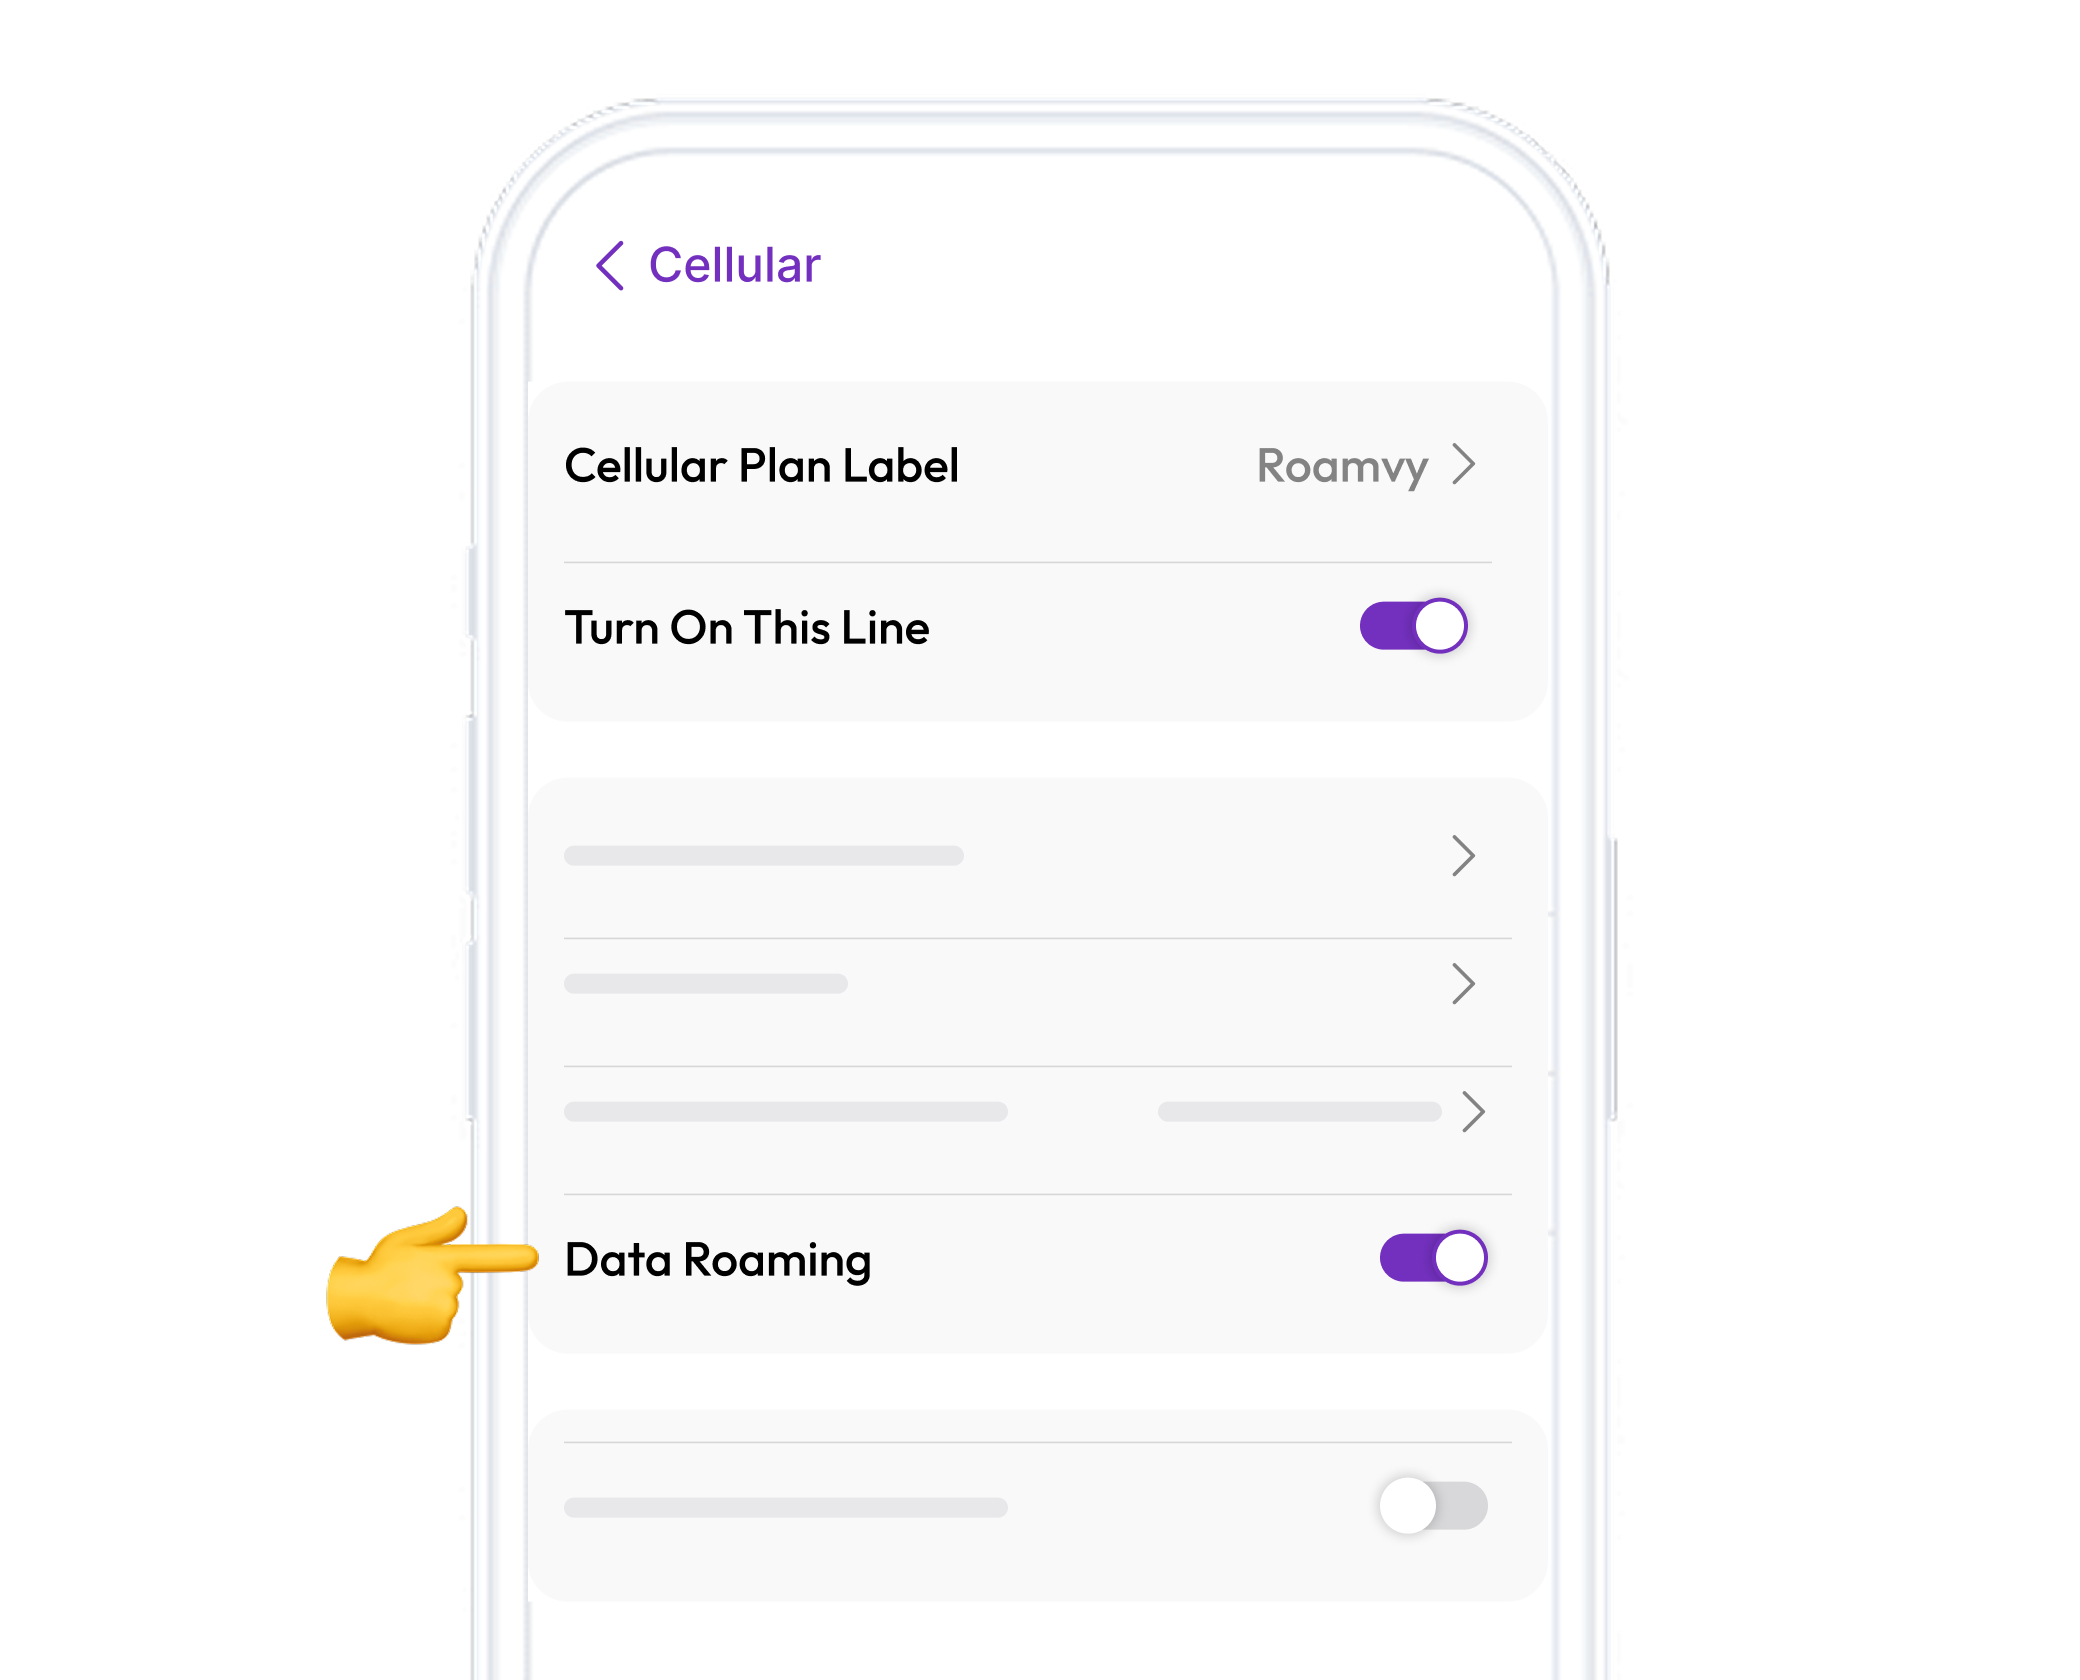
Turn on Data Roaming
Open Settings on your iPhone and select Mobile Data or Cellular.
Select Roamvy or your newly added eSIM in the list.
Scroll down until you ind Data Roaming and turn it on.
Congratulations! Your plan has now been installed and is ready to activate.
Download Activation GuideThat’s it! Your plan is now active and you can start using your data.
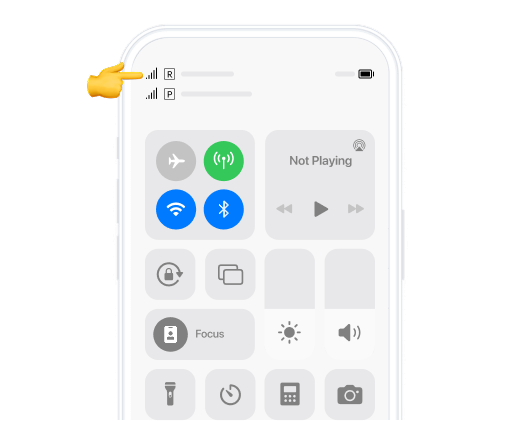
How do you know that your eSIM is active?
- 01. Make sure there is at least one bar in the signal icon on your iPhone.
- 02. Go to “Settings” on iPhone, select “Mobile Data”, click on “Roamvy” and ensure “Data Roaming” is turned on.
You can check in two ways:
Don’t worry, we are here for you!
We know this process is not easy, so you can find us 24/7 in our Support Chat.

Chat with us